Access Portworx Backup UI using an AWS ALB
Perform the following steps to use an AWS Application Load Balancer (ALB) to access Portworx Backup UI:
Remove the AWS Elastic Load Balancing (ELB) service and change to NodePort, and add Port 443. Ensure the target port is set to 8080. For example:
- name: http
port: 80
protocol: TCP
targetPort: 8080
- name: https
port: 443
protocol: TCP
targetPort: 8080
Run the following commands to set up ALB:
kubectl apply -f https://raw.githubusercontent.com/kubernetes-sigs/aws-alb-ingress-controller/v1.0.0/docs/examples/rbac-role.yamlcurl -sS "https://raw.githubusercontent.com/kubernetes-sigs/aws-alb-ingress-controller/v1.0.0/docs/examples/alb-ingress-controller.yaml" > alb-ingress-controller.yamlYou can modify the cluster in the
yamlfile and then apply the file.Verify that your ALB controller is running:
kubectl get pods -n kube-systemLaunch ALB with default port 80. For example:
apiVersion: extensions/v1beta1
kind: Ingress
metadata:
name: "px-backup-ingress"
namespace: "px-central"
annotations:
    kubernetes.io/ingress.class: alb
    alb.ingress.kubernetes.io/scheme: internet-facing
    alb.ingress.kubernetes.io/subnets: subnet-0b220d16cacdde728, subnet-086e80f21d1666074
labels:
    run: pxcentral-frontend
spec:
rules:
    - http:
        paths:
        - path: /*
            pathType: ImplementationSpecific
            backend:
            service:
                name: "px-backup-ui"
                port:
                number: 80
Note: You can skip thealb.ingress.kubernetes.io/subnets:parameter, if you use the latest version of ALB and Kubernetes. If there is an issue while launching ALB, an error message appears in the ALB controller pod that it is not satisfying the subnets. You need to add this line and pick the subnets from VPC (Public Subnets used for EKS Cluster).Get the ALB endpoint once the above ingress resource is applied.
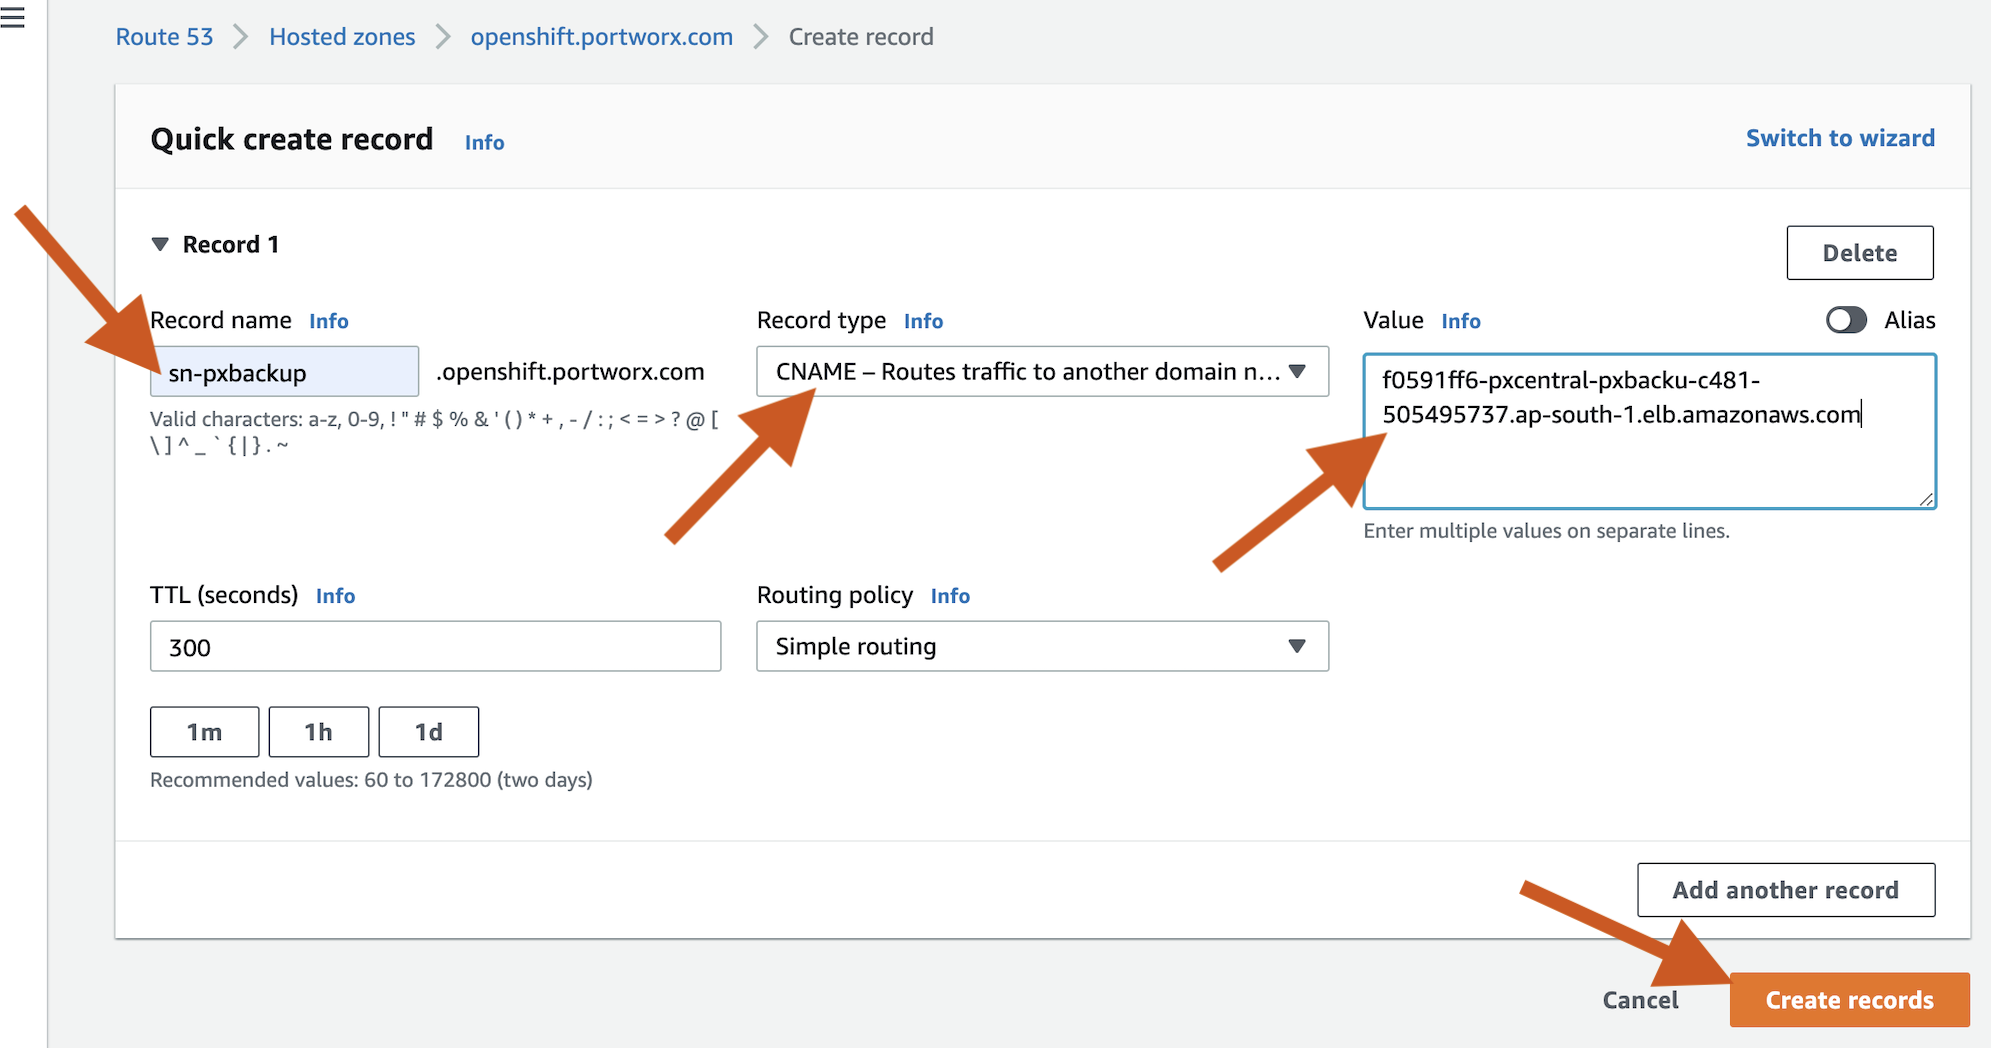
Create the CNAME record with the above endpoint.
Setup SSL with ACM:
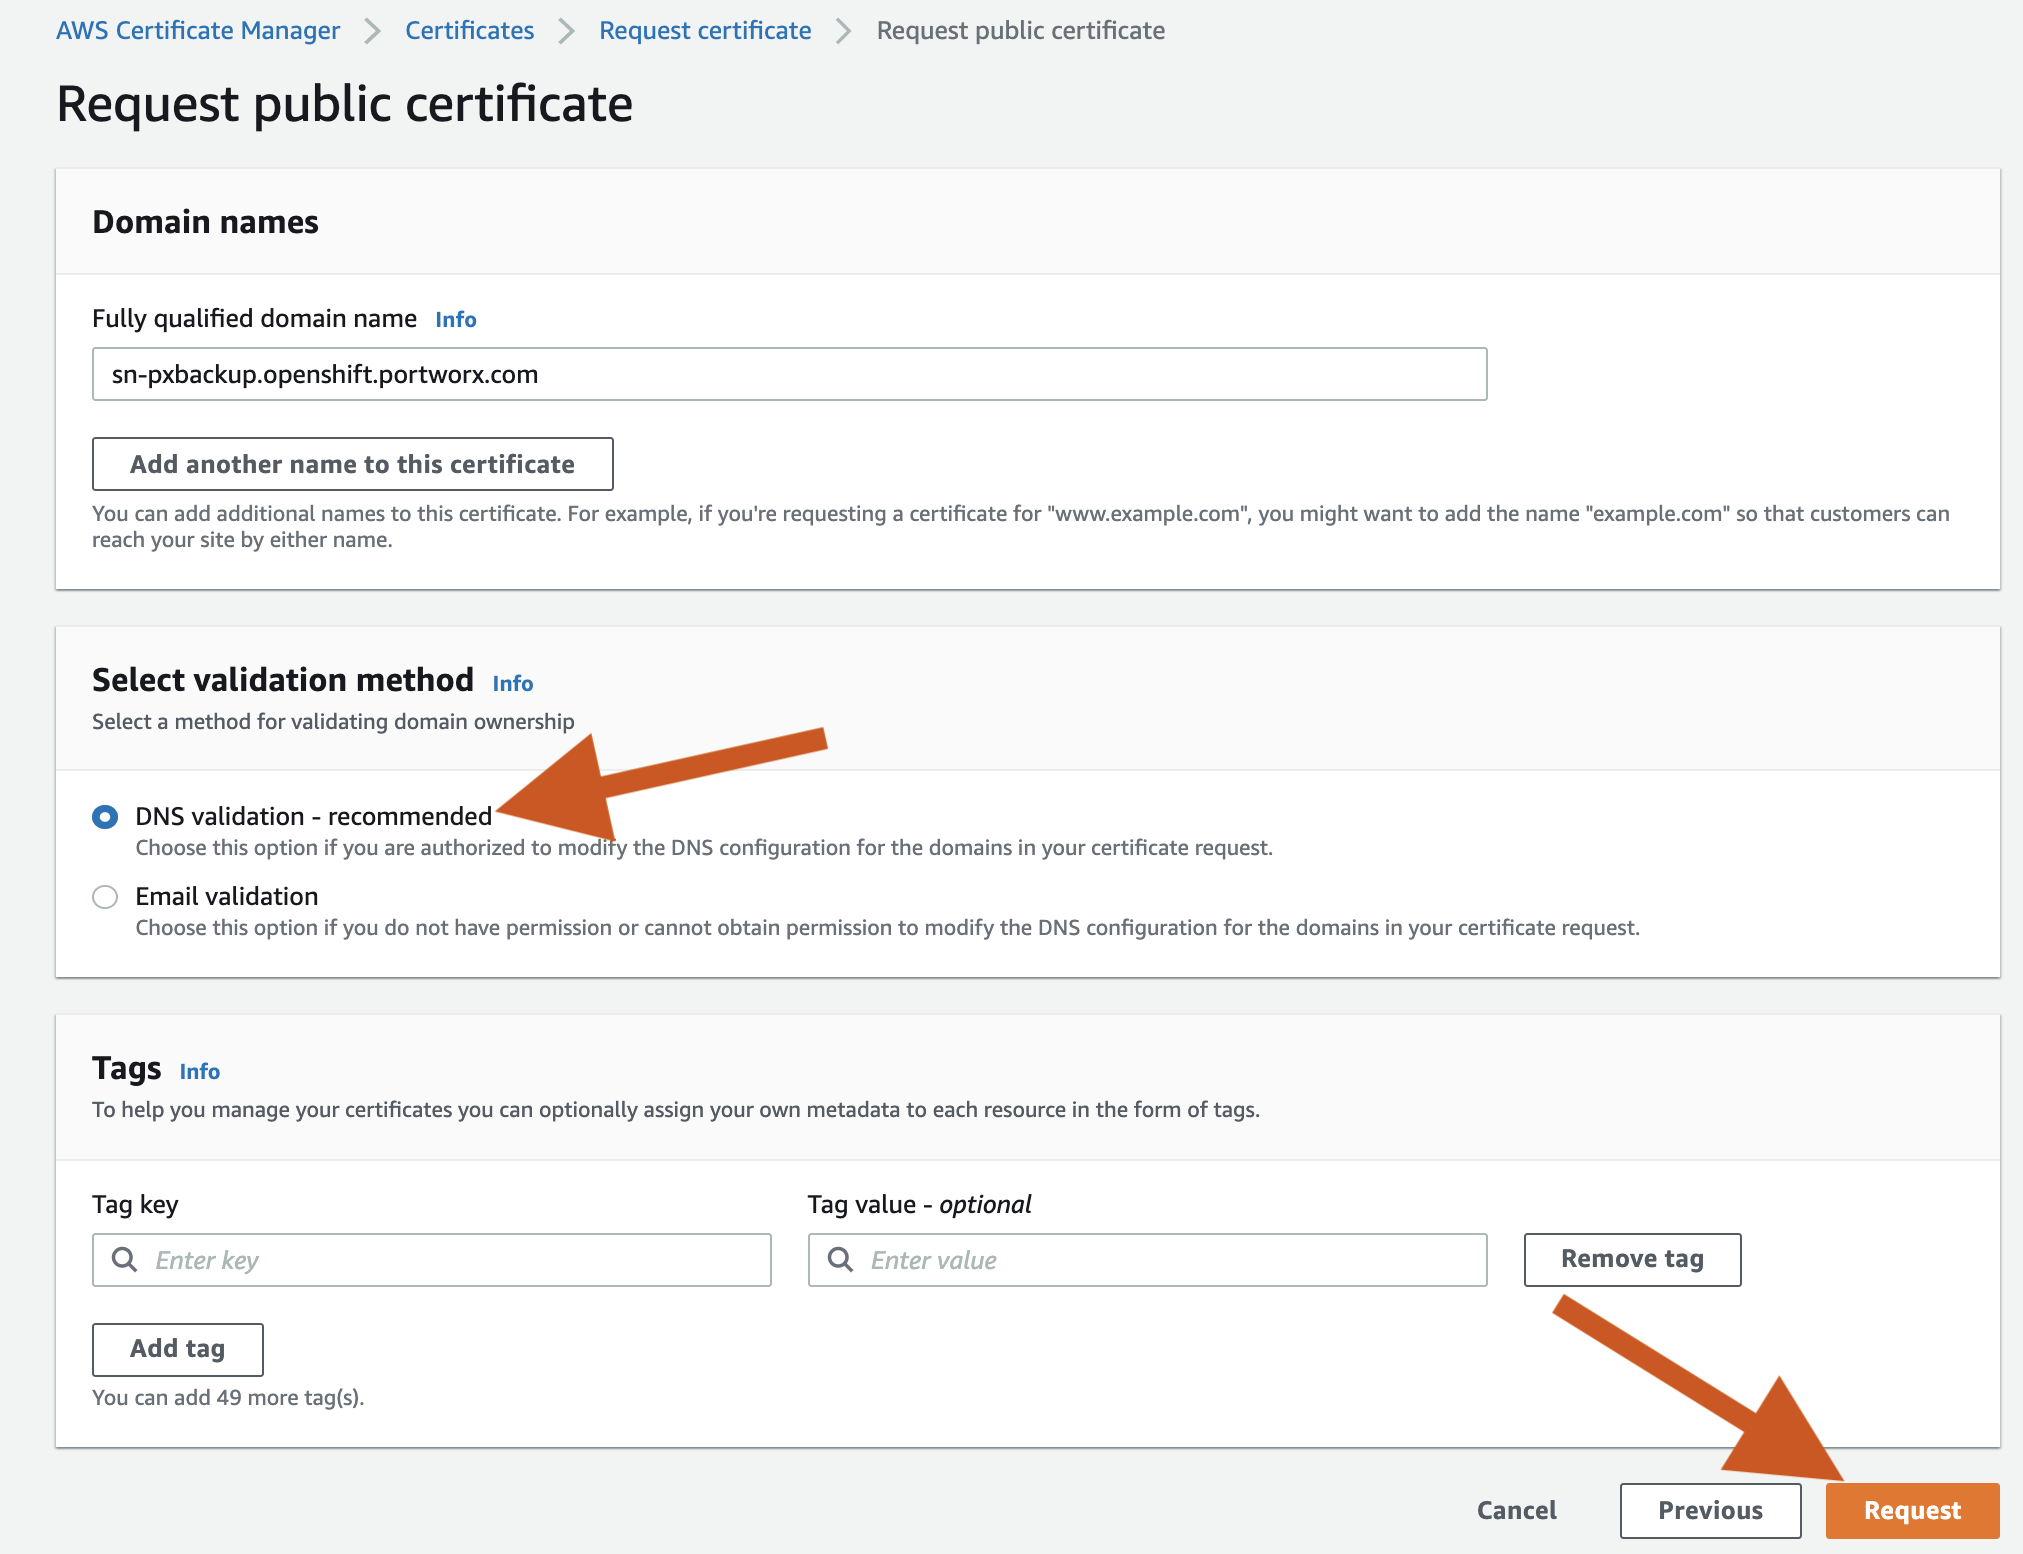
- Navigate to the AWS Certificate Manager.
- Select Request -> Public Certificate -> FQDN (sn-pxbackup.openshift.portworx.com) -> DNS Validation -> Request.
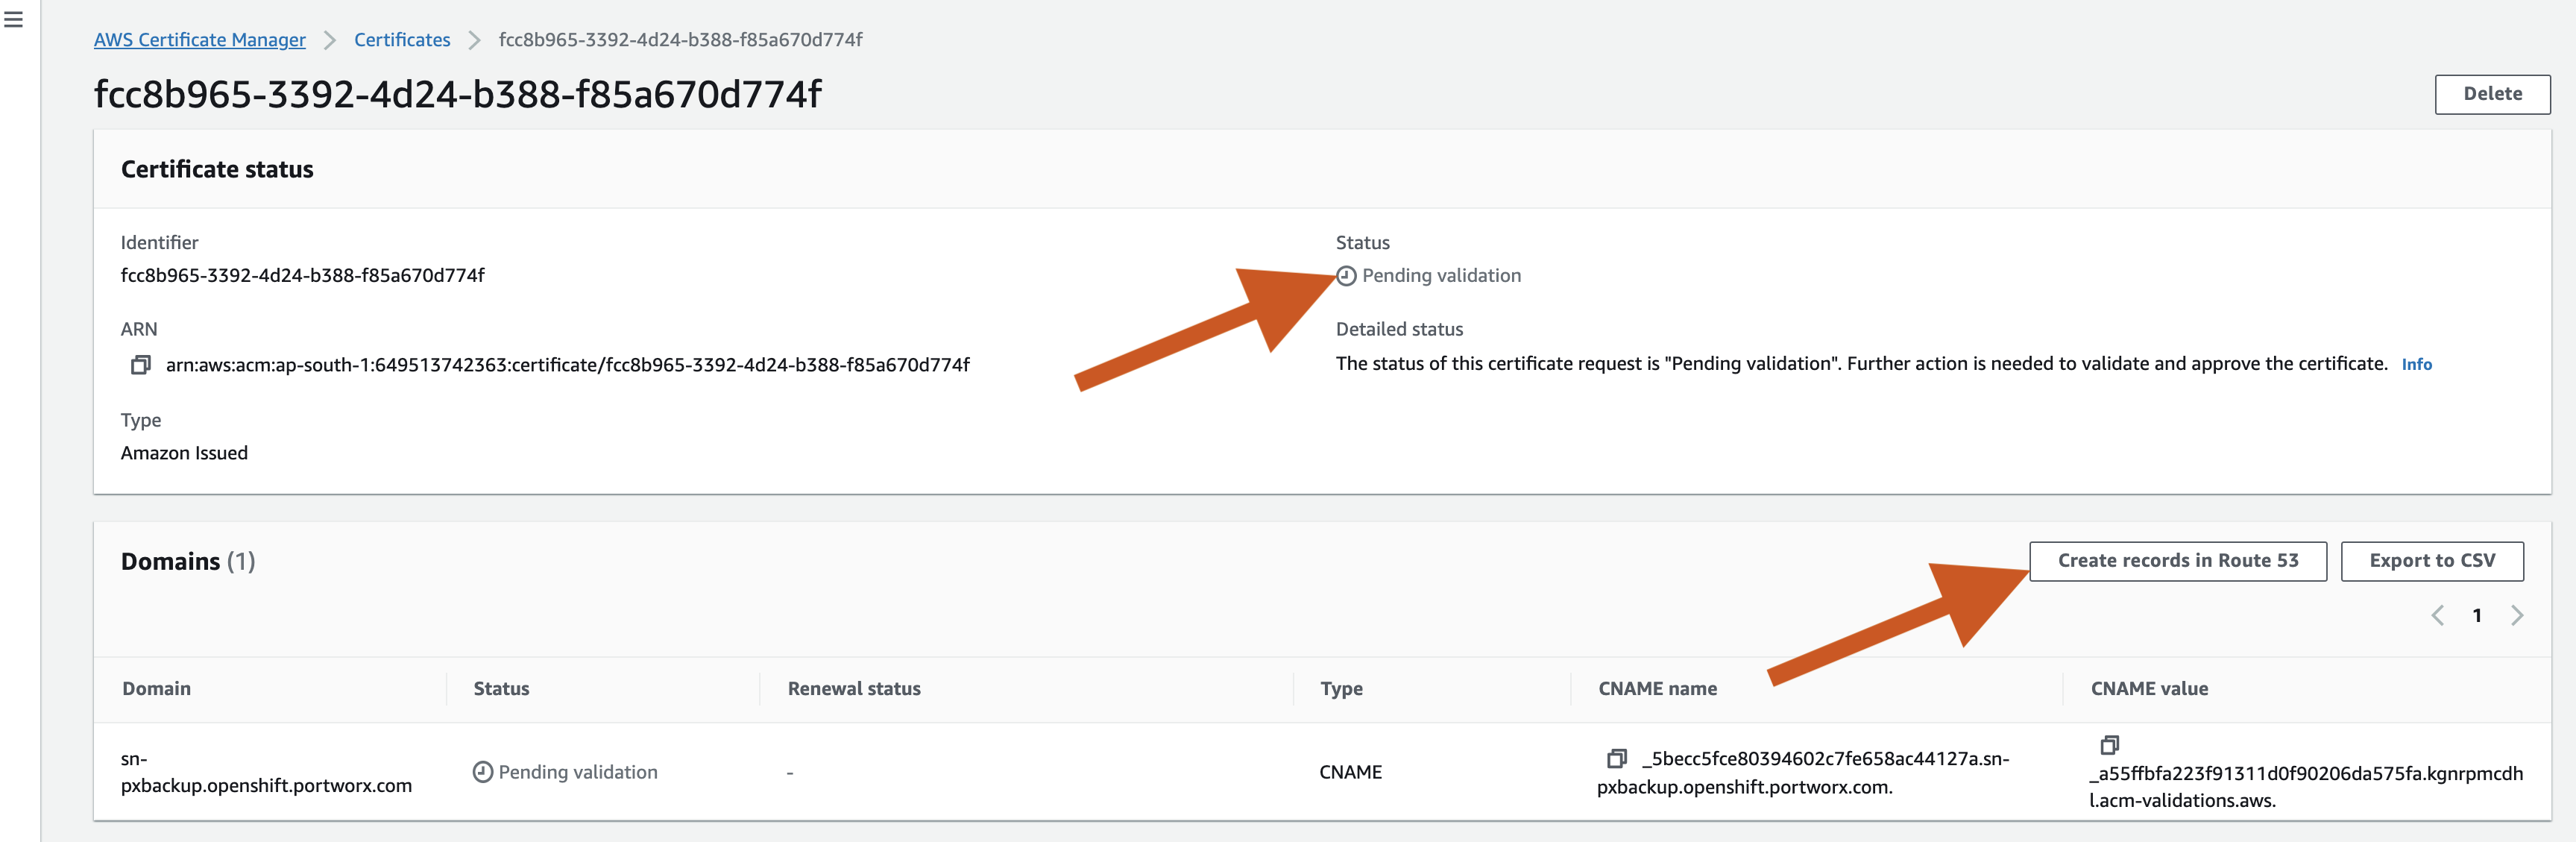
You can view that the status is Pending Validation, under the Certificate status. So, select the certificate number and then click Create records in Route 53.
The status is changed to Issued after sometime.

Click the certificate ID and copy the ARN number, which is used in ingress resource.
Select the application you created -> Authentication -> Web URI, and add your Portworx Backup URL endpoint.
Configure Azure AD Authentication by selecting the application you created -> Authentication -> Web URI and add your URL endpoint.
You can login to your domain (https://(your-application-name).openshift.portworx.com/) with your Azure AD.